syllabus
Variable resistors are components that are able to have their resistance adjusted, changing from zero to a maximum value. For example, potentiometer, the component you used in the Arduino Basics Lab, is a varaible resistor. You can use them in a simple circuit with an LED to adjust brightness, or in a voltage divider circuit to be read by an Arduino, in order to produce different outputs.
Voltage dividers are a commonly used circuit that outputs voltage proportional to the ratio between two resistors. For your purposes, this is used frequently to convert variable resistance into variable voltage, for the Arduino board to read as input. Browse through this article - Go over it slowly. Don’t worry about the math, but do understand the basic concepts, and most importantly, how you can use this to make your own circuits.
Next, learn about the following components that offer variable resistance.
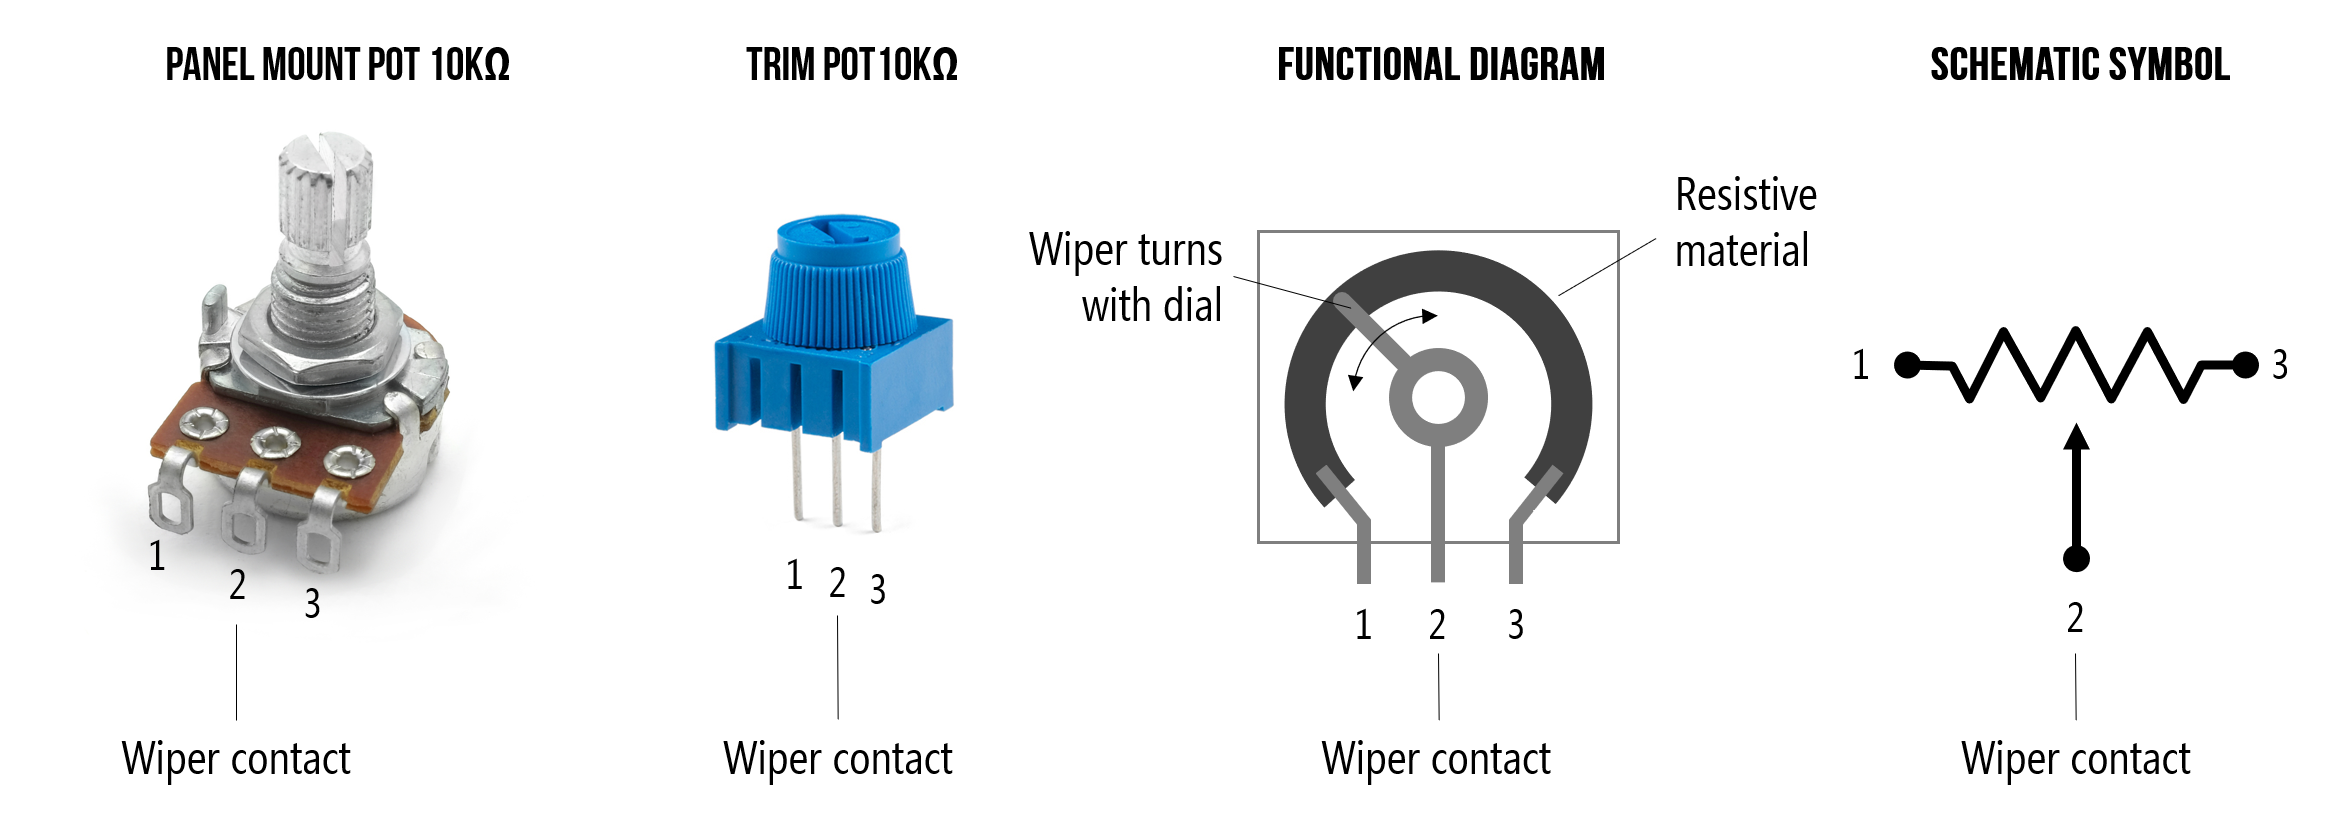
Potentiometer
A potentiometer has a metal contact, called a wiper, slides along a resistor, deviding the resistor into two halves. You can get these from the VFL or our Physical Computing cart in Rodel’s office.
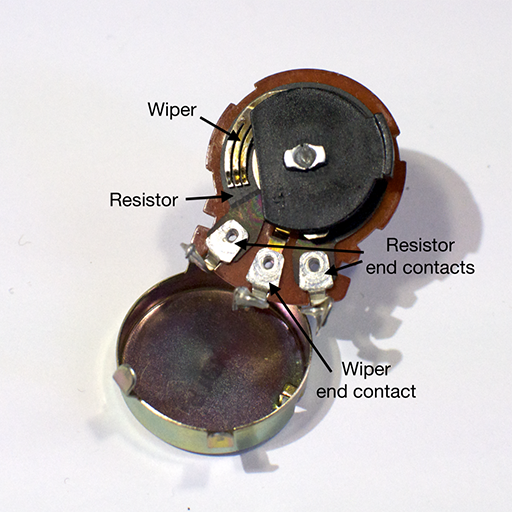
second image from ITP Physical Computing
Photocell
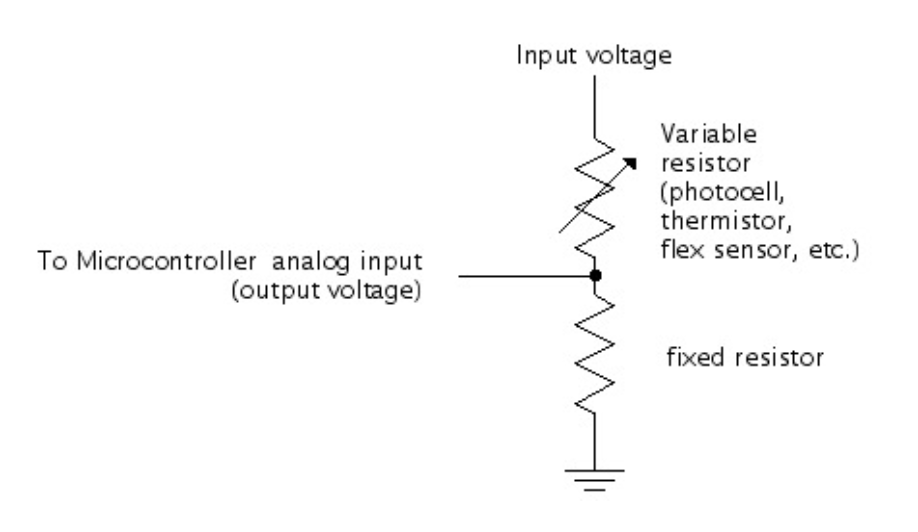
Unlike a potentiometer, most other variable resistors - like the photoresister (photocell) - only have one resistance that changes (which you can tell because there are only two pins to connect its endpoints, not three). So to make a voltage divider in those cases, you need to add a second resistor yourself.
Read the Sparkfun guide on using a photocell. You can also get these from the VFL or our Physical Computing cart in Rodel’s office.
Stretch sensor, Flex sensor, Pressure sensor/FSR, etc.
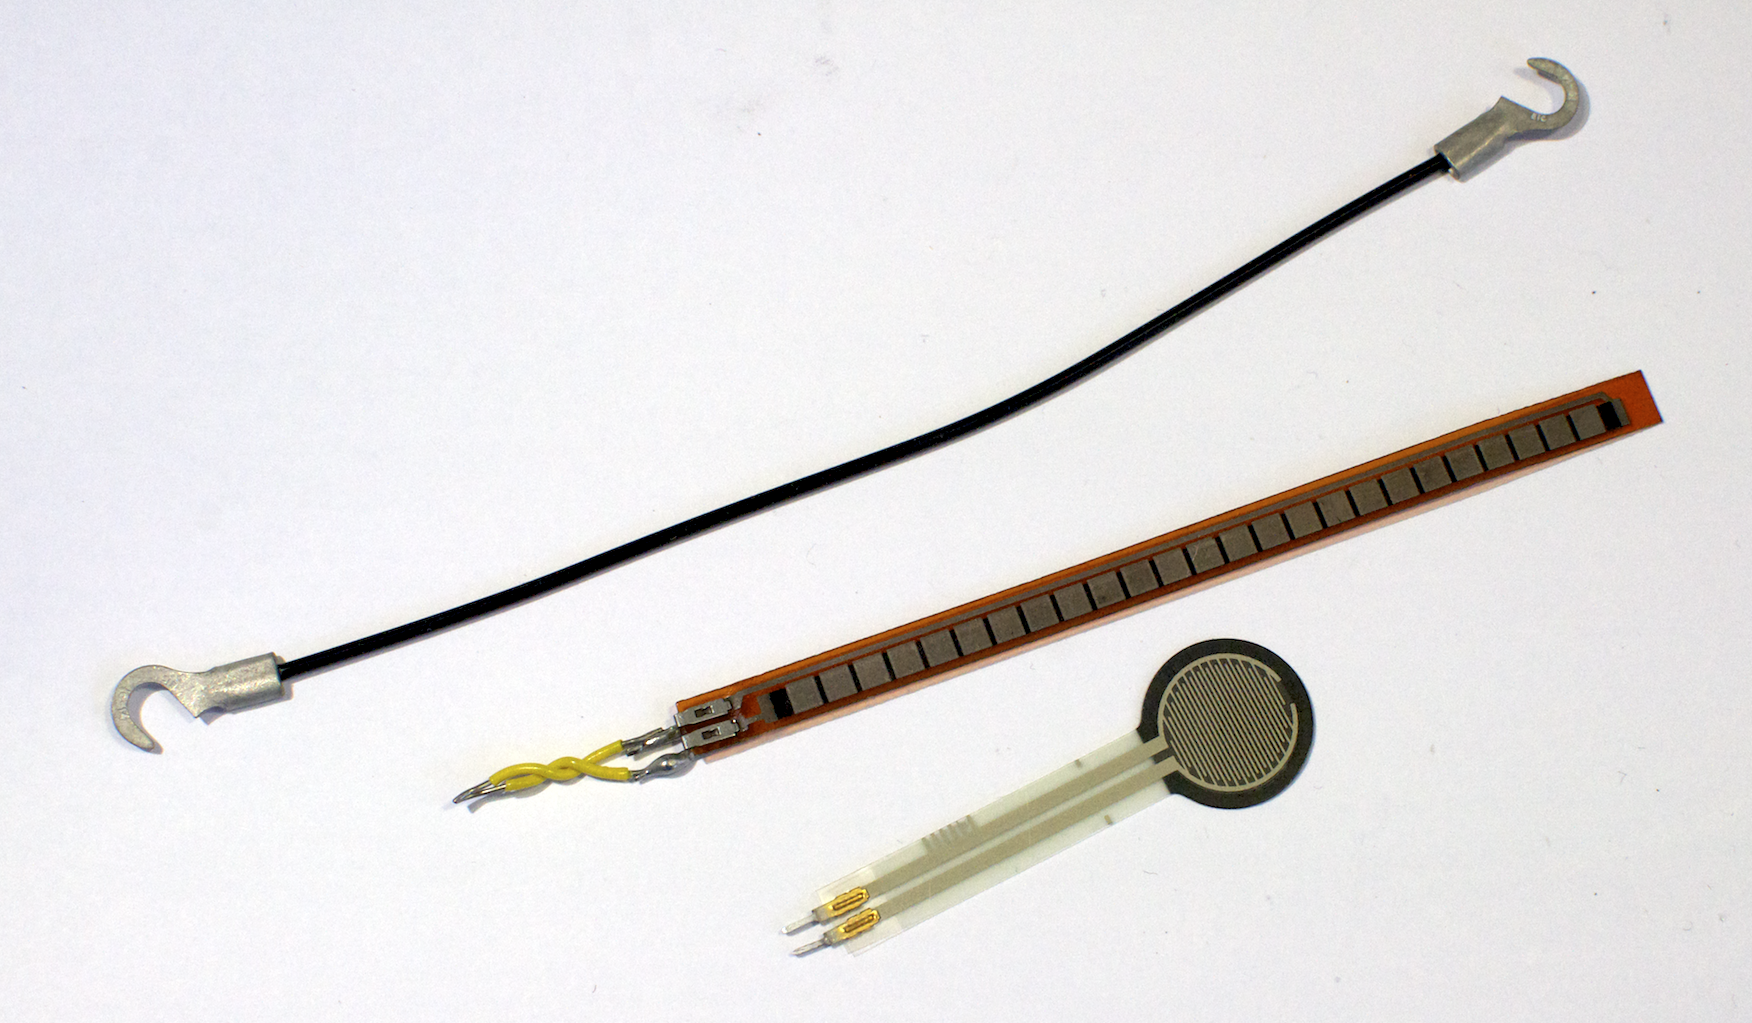
There are many other sensors that use a variably resistive material. In the photo, a stretch sensor (top), and a pressure sensor/FSR (bottom) is made of conductive rubber, which changes resistence when it’s being stretched or pressed. A flex sensor (middle) can be made of many different materials, and is used to measures the amount of deflection or bending.
You can check these out from our cart (Ask Rodel). Read the Sparkfun tutorials if you’re interested in using them: pressure sensor, flex sensor
You can even make your own sensor at home! This tutorial shows how to make a flex sensor with cardboard and tin foil. If you’re interested in DIY varying resistor sensors, espeically soft electronics / wearables, How to Get What You Want is a great website for related resources.
Optional: If you really want to understand the theory behind voltage dividers, read the Sparkfun Tutorial. Don’t worry if this is too technical for you, what’s important is knowing how to use it to help you make what you want to make.
Lab Exercise
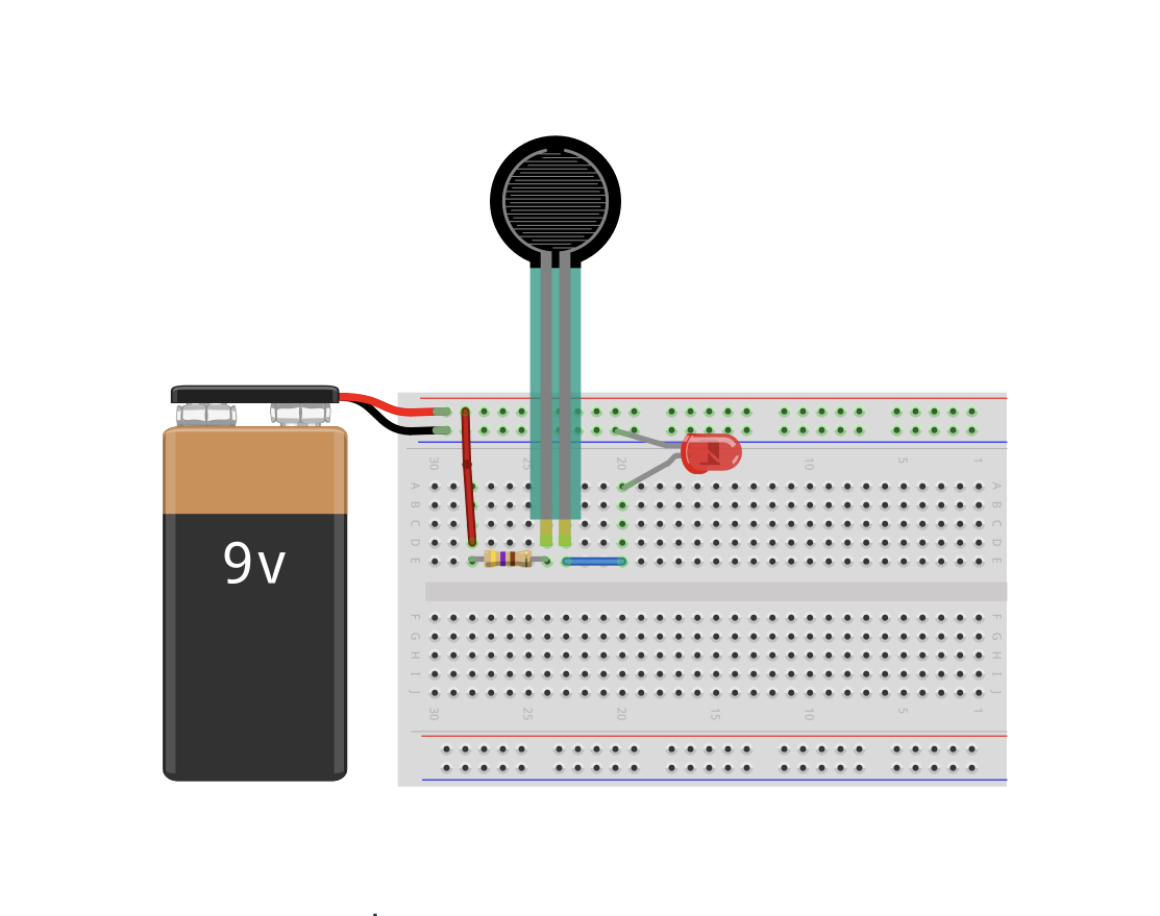
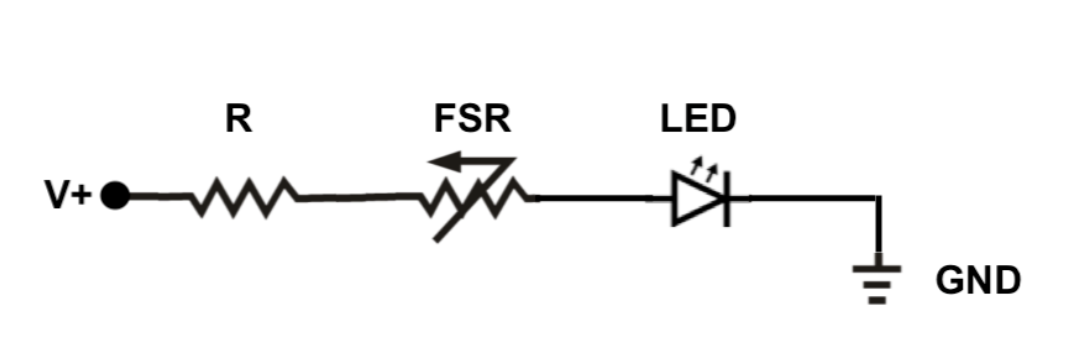
Hook up at least one, preferably two, variable resistors in a breadboard with power and ground and an LED. Remember to include a static resistor in series to protect the LED. See example circuit below. Practice using the multimeter to see how resistance changes as you manipulate the sensor.
If you’re still unclear about how to use a multimeter: go back to the multimeter lab from last week, and read this for a different take.
Tips:
- Put in short extra wires on the same rows as the resistor legs (or other points plus ground if you are testing voltage) to provide extra places to probe with multimer
- Use alligator clips and/or other aids like tape and cardboard to keep the circuit connections stable while you read the multimeter.
- Prop up the multimeter using the stand in the back, or leaning on something, so you can easily see the display and adjust the mode knob while you work.
- Measure resistance with the power OFF. Measure voltage with the power ON.
Next, turn the power on and see how the LED brightness varies as you manipulate the sensor. Note how the dimmest and brightest behavior is different for each sensor because its resistance is different. Some go from 0 - 10,000 ohms. Some go from 300 - 30,000 ohms. Other factors such as ambient brightness with a photocell will also effect the resistance differently if you move the circuit to a different room.
Example Circuit with Pressure Sensor:
Blog about your findings and questions!